WPFAQBlock makes it easy to create and display FAQs anywhere on your WordPress website using a Gutenberg block or shortcode. This guide will walk you through creating your first FAQ category, adding FAQs, and displaying them on a page.
Pre-Installation Checklist:
WPFAQBlock is installed and activated.
You have access to the WordPress admin dashboard.
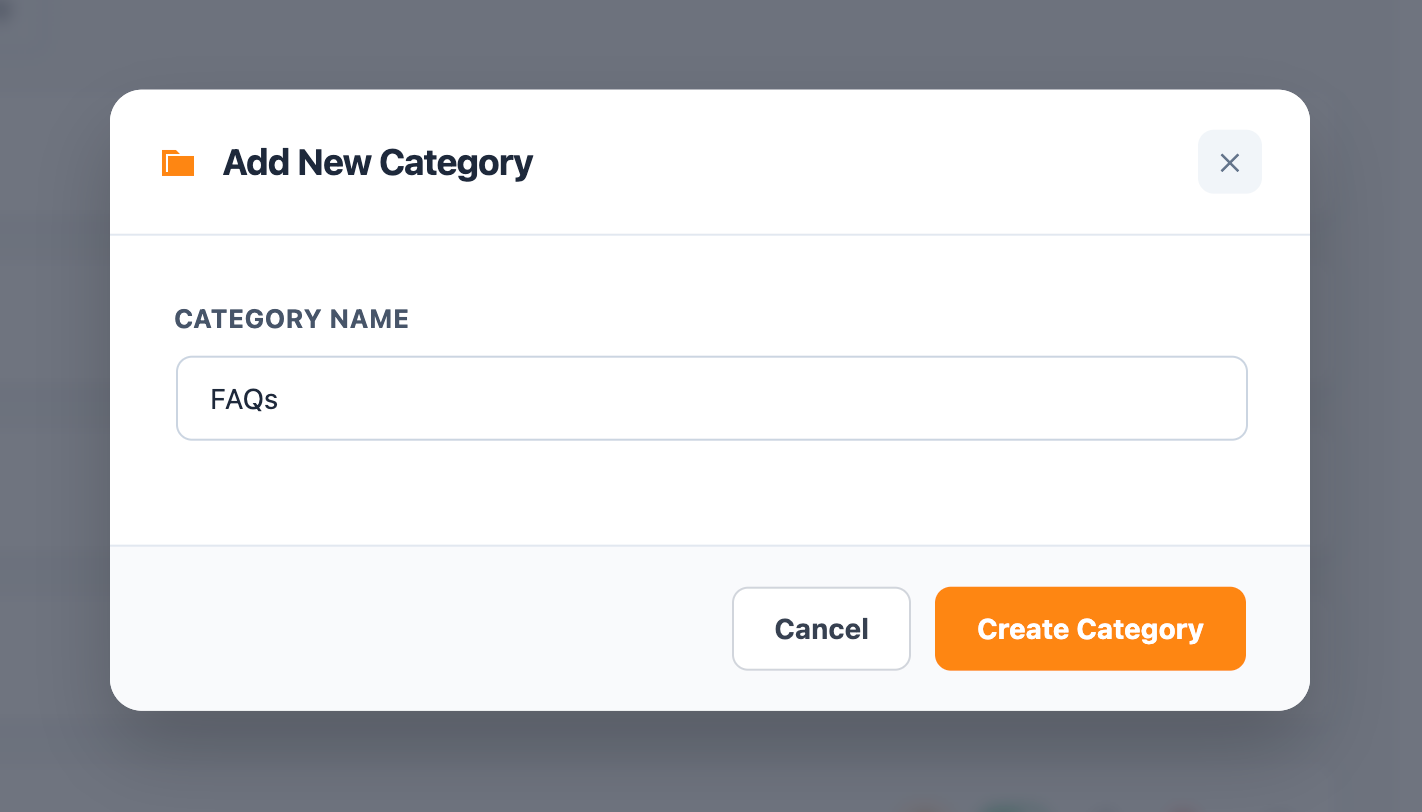
Step 1: Create an FAQ Category
FAQ categories help organize your questions into groups such as Support, Pricing, Shipping, or Product FAQs.
Go to WPFAQBlock → Dashboard.
Click Add Category.
Enter a category name.
Click Save.
Your category is now ready to store FAQs.
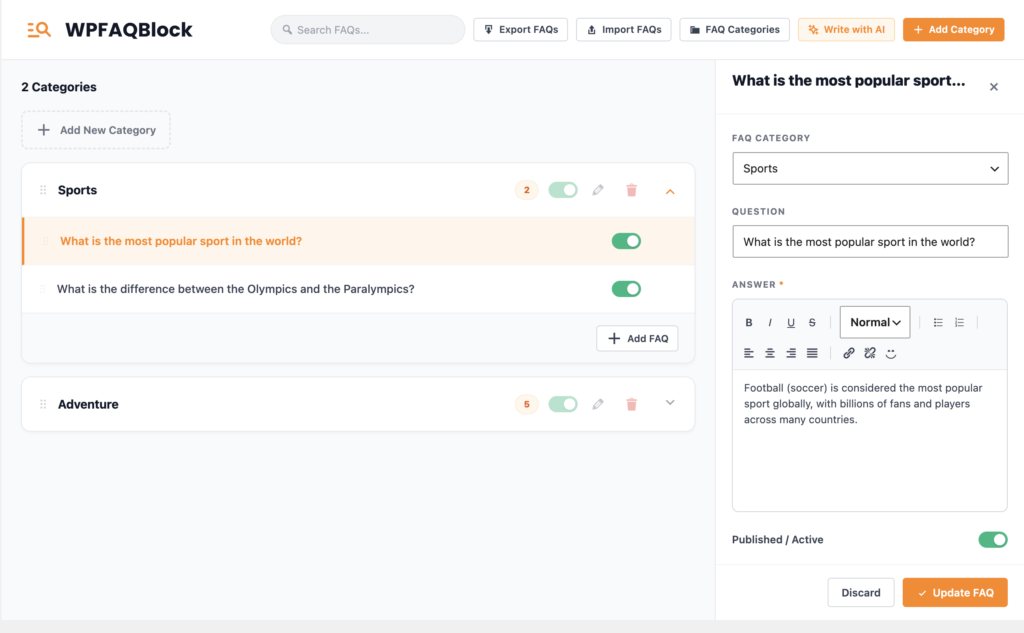
Step 2: Add FAQs
Once your category has been created, you can start adding questions and answers.
Open WPFAQBlock → Dashboard.
Select your category.
Click Add FAQ.
Enter your question.
Enter the answer.
Save the FAQ.
Repeat the process for each FAQ you want to add.
Example Question
How do I install WPFAQBlock?
Install the plugin from the WordPress plugin directory and activate it from the Plugins screen.
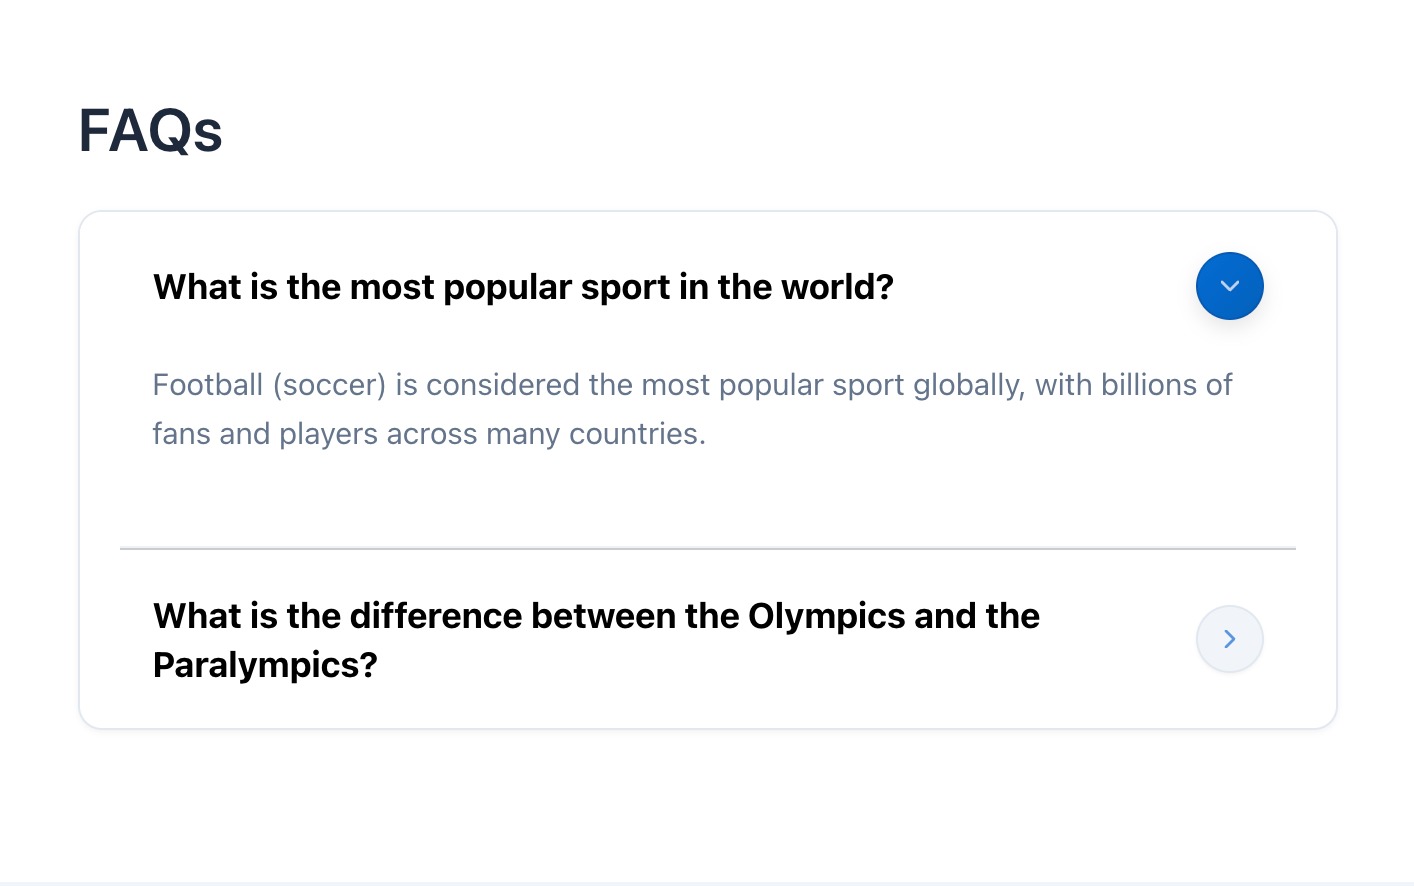
Step 3: Add FAQs to a Page
WPFAQBlock includes a Gutenberg block that allows you to display FAQs anywhere on your website.
Edit the page or post where you want to display FAQs.
Click the + button to add a block.
Search for WPFAQBlock.
Insert the block.
The FAQ block will now appear inside the editor.
Step 4: Choose Which FAQs to Display
Configure FAQ Selection
Select the WPFAQBlock block.
Open the Block Settings sidebar.
Under the Selection tab, choose how you want to display FAQs.
Display FAQs from a specific category.
Select Choose a Category.
Choose the desired category from the dropdown list.
Display only the FAQs you select.
Select Choose Specific FAQs.
Search for the FAQs you want to display.
Select one or more FAQs from the search results.
Step 5: Customize the FAQ Display
Open the General and Design tabs to customize the FAQ section.
Available options include:
FAQ title
Search box visibility
Accordion behavior
Open first FAQ by default
Display all answers expanded
FAQ themes
Accordion icons
Changes are shown directly in the editor preview.
Step 6: Publish the Page
Once you have finished setting up your FAQ section:
Click Publish (or Update if the page already exists).
Open the page to see how your FAQs appear to visitors.
Your FAQ section is now live and ready to help your audience find answers quickly.
Display FAQs with a Shortcode
You can also add FAQs anywhere on your website using a shortcode.
Show All FAQs
[wpfaqblock]
Show FAQs from a Specific Category
[wpfaqblock category="support"]
Show Selected FAQs Only
[wpfaqblock ids="12,34,56"]
Simply copy and paste the shortcode into any page, post, sidebar widget, or other area that supports shortcodes.
Optional: Enable FAQ Schema
FAQ Schema helps search engines better understand your FAQ content, which may improve how your FAQs appear in search results.
To enable FAQ Schema:
Go to WPFAQBlock → Settings.
Turn on FAQPage Structured Data Output.
Click Save Changes.
WPFAQBlock will automatically add schema markup to FAQs displayed on your website.
What’s Next?
Now that your FAQ section is live, you can:
Customize the look and feel of your FAQs.
Organize FAQs into categories.
Generate FAQs with AI.
Import or export FAQ content.
Reuse FAQ sections with shortcodes across your website.
Explore these features to create a better experience for your visitors.
Try WPFAQBlock Risk-Free for 14 Days
You are protected by our no questions asked refund policy.